More easy Christmas cards
Monday, October 30, 2006
I hope that lots of you are starting to think about making your own cards this season! I've got lots more ideas coming for those of you that are. There are also lots of great classes planned to get you started, or you can contact me to host your own class. One class makes three cards for $5 - great deal!

Here's a card that features a technique I don't think I've talked about - chalk popping! Chalk popping not only looks good, it's quite fun to do. Using a versamark ink pad, stamp your image. You won't be able to see it very well, but once you start applying chalk, it appears! I use a simple sponge dauber and dab on the image. Rubbing doesn't tend to work very well, and you will risk smudging your image up.


The snowflakes were chalk popped in Vineyard Berry chalk. I LOVE that the soft chalks match the CTMH colors! I also used a sponge dauber to apply ink (another great use of the daubers) to the "Merry Christmas" square.

As an aside, I apologize for recent troubles with this website. I've been working hard at getting it to work in all platforms and browsers, but I may have to resort to switching the site over to another blog service. I will keep you posted. Till then, know that I have been *trying* to post all my ideas, they just don't want to stay on the site!


Quick and Easy!
Sunday, October 29, 2006


For the next couple of posts, I hope to show you some quick and easy Christmas card ideas. I know, I know... it's still early, but if you plan on making your own cards, it's easiest to do a few at a time.

I've made some of these cards as flyers for an upcoming workshop (when you're a CTMH consultant, "flyers" takes on a whole new meaning!). So, they had to be quick and easy! There isn't much in terms of embellishments, which is great if you are planning lots of cards.

This card features some Liquid Glass. It's a great way to add a little something to a stamp. It's hard to see in the scanned image, but it gives it some texture and shine. It's applied to the dots and the top of the "snow" in the above card.

I also used a basic white cardstock as my base and random stamped it. This way, you can print off the writing you would like on the inside of the card and decorate the top of it.

Altogether, I think this card only cost about $0.08. A great option for saving money this Christmas!!


The desire to change
Thursday, October 26, 2006


This is a pretty basic layout that I created to match one that was already completed in my album. It features more random stamping (which I LOVE - a great way to spice up cardstock) and a simple color-blocking layout.

Not seconds after uploading the picture, however, I had the urge to go and change things. This has always been a challenge for me... resisting the desire to do too much on a page. Also resisting the desire to go back to old layouts I've completed and change them to match my current scrapbooking style. However, I feel it's important to keep reminding myself, and everyone else, that although your style may change throughout the years, the photos are still displayed beautifully and with love and care... and that's what really matters!

So, remember, keep it simple and keep your goal in mind. Not every page has to be "the best you've ever done" in order for it to be gorgeous!

But... I did make one little change. Can anyone guess what it might have been (not including adding photos!)?

Oh, and I'm trying to remember to post layouts before I add pictures to prevent the annoying flash glare. Hopefully I'll continue to remember ;)


Things I've Learned
Tuesday, October 24, 2006


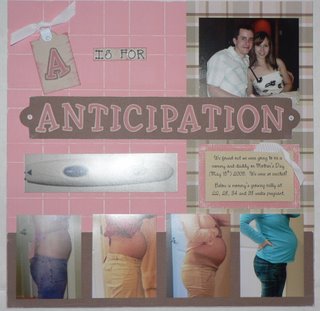
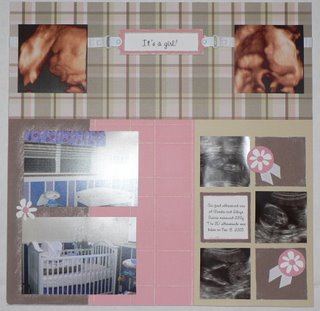
So, these above layouts actually have some non-CTMH papers in them. *Gasp*... yes, I do use SOME other scrapbooking supplies... lots of which I had prior to learning about CTMH. I don't discourage anyone from using a mixture of supplies, it's pretty much inevitable. But, I have learned something from this "kit" that I had purchased. I purchased a kit (from a company that I will keep nameless) that had a beautiful album and matching papers and elements. I loved it, but I spent far too much money on it. I blame it on the pregnancy. Though the album is beautiful, I do actually prefer the strength and quality of the CTMH albums (and the page sizes, they are fantastic... you never have to bend pages to get them in when they have elements on them).

But, my biggest frustration is that #1 - there totally wasn't enough in the kit to complete the album, which isn't so much a problem if it wasn't paired with #2 - I can't find anything to MATCH the stuff that it came with!! This is a major frustration of mine when shopping at the large scrapbooking and crafting stores. You can get totally overwhelmed with the amount of stuff there, and you find something you like only to have to spend a ridiculous amount of time trying to find elements, inks, etc to match it! ARGH!

So, I don't mean to be bashing people over the head constantly with reasons why I like CTMH... but this is certainly another one of them!!! I know that when I buy paper, inks, whatever, that there will always be stuff to match it. It's so much easier. And, I'm a little picky when it comes to matching.

Ok, that's all the ranting I'll do about that.

I used photo hangers in the above layouts too. I love those! I've got two different uses for them above, one uses a hanger for the top of a tag, the other layout uses two hangers on a book plate to attach ribbon. There are lots more too. Play with them!


Card block BEGONE!
Friday, October 20, 2006


Ok, so I finally got past my card-making-creativity block... for the time being, anyways! I've started on the Christmas cards for various upcoming classes, and done a few additional cards as well. Yay!

This card features something I'm in LOVE with these days... dimensional elements! I love the look of these when covered in cardstock and distressed (with sandpaper). It almost looks like a piece of wood. I also did some random stamping on this piece.

The stamp in the dimensional frame was done in two colors by covering one side with clear tape, inking, then removing the tape (do NOT forget that step!!!). I then did the same while covering the opposite side.

Also, as a side note... my scanner simple did not do justice to some of the colors here. The frame is done in Indian Corn Blue - anyone who has seen this color knows that it is not so purpley. The scanner makes it look like it clashes both with the random stamping ink, and the Amethyst B&T paper. Honest it doesn't ;)


Speedy Scrapbooking
Thursday, October 19, 2006


Ok, so the last few days I've hit a bit of a creativity block. I've been trying to come up with some new, fantastic cards for upcoming classes, but I'm just blocked... so today I'm posting another idea from my last class.

This is a great tip for those like me who have TONS of pictures that are awaiting scrapping. I used the photo storage pages, and matched a set to the "adorable" layout of a few days ago. By adding some mats and a journal box, you can make a storage page look great next to a layout. It's super speedy, and still looks great!

I was also asked a lot about the dual colored stamping in the above layout. To do this, I simply stamped the image in Sweet Leaf ink (the green) on a piece of cardstock, then another image in Hollyhock on another piece of cardstock. I cut out the inner part of the Hollyhock image, leaving a little bit of white around it (to ensure good coverage of the Sweet Leaf). Then, I just glued it on top. You can also do dual colored stamping using tape to tape of part of the image while inking, just be sure to remove the tape before you stamp!!

I hope your days are "creativity-block-free"!


Prisma Glitter
Tuesday, October 17, 2006


The second I was introduced to prisma glitter, I LOVED it. The photo just doesn't give it justice, but it looks absolutely gorgeous. I used it on the maple leaf in the above card. To use it, it's best to use and adhesive sheet. Cut the sheet to the desired size and peel the backing of one side. Adhere to the picture and peel the other side off. Then, sprinkly the glitter liberally over the image, pressing down a bit with your fingers (be prepared to be glittered yourself... all... day... long...). Shake off the excess glitter, and you have a gorgeous sparkling image.

I can't wait to use this on some snowflakes for Christmas cards! I think it will really make the cards!


Class Layout
Monday, October 16, 2006


We had fun at the class yesterday creating the above layout. It follows along with a lot of the ideas I've been posting about lately - using your cardstock to it's greatest potential, money saving ideas and getting the most use of your stamp sets.

Another idea encorporated into this layout is ribbon stamping. We used a simple piece of White Daisy grosgrain ribbon, and stamped it with the Ritzy Ribbon stamp set. This gives you the option of adding a little something extra to your ribbon, and making it any color you want. You can also dye the white ribbons with any of the CTMH re-inkers.

Also... a little bit of blog housekeeping. I just wanted to let everyone know that I have decided to include all the layout details in the photo details (click on the photo, and it should take you there). This way, the details don't clutter up all the entries, but you still have access to all the info on colors, papers, etc used in the layout. And, I'm still working on fixing some of the problems of this site in Internet Explorer. For those of you using that browser, send me an email to let me know if it's better, or if it is still garbling some of the site for you. I hope it's fixed for you soon!!


Paper flower fun
Friday, October 13, 2006


I must say... originally I was not a big fan of this paper packet (Just Chillin paper packet). But, I found that once I paired it with some favorite embellishments, I really loved this layout! So, that's a handy tip - use favorite embellishments to make a not-so-favorite paper come to life!

I used Just Blooms paper flowers here, and paired two together, attaching them with a sparkly brad. I inked the white flowers with a touch of Vineyard Berry ink using a sponge dauber. I love that trick! That's how I "antiqued" the Desert Sand cardstock too (using Desert Sand ink and a sponge dauber). Sponge daubers are so cheap, and so useful. You can get even more use out of them by cleaning them with the Spritz stamp cleaner (gets them way cleaner than just soap and water!).

To make sparkly brads, you can take any ordinary brad (any color too!) and heat it with a craft heater. Then, dip it in embossing powder and reheat. Quickly transfer it to your glitter, coating it well. I find it really helps to then reheat it a little more. It makes sure that the glitter doesn't flake off the brad. You can also use this trick to make any brad any color. Just use the embossing powder (with no glitter). You may find it works best to coat the brad 2 times with the embossing powder (heating and cooling in between). I love how this makes every brad so versatile!


Random stamping
Wednesday, October 11, 2006

Spring Thankyou, originally uploaded by scrappysquared.

Random stamping can turn ordinary white cardstock into a great background. I've used it here in a simple thank you card, but it works great for entire page layouts too. You can see it in the "friends" layout in the recent project pictures as well.

The textured cardstock in this card also adds a little something. The Sweet Leaf blocks on the left are textured, and I brought out the texture a little bit using some chalk.

Two easy and inexpensive additions to make your pages beautiful. Happy scrapping!


More dry embossing
Monday, October 09, 2006
Here's a layout featuring dry embossing:


It just goes to show you that you don't need to have all the fancy papers you see to make a great layout. This layout (designed by Andrea York) uses Pink Carnation cardstock that is dry embossed using a stylus, then sanded. The photo boxes (yet to be filled) are Desert Sand cardstock. It also features the new Just Blooms paper flowers, centered with a gold brad. The stamp sets used are the Rustic alphabet, Whimsy lowercase alphabet and Sketchin's (a great versatile set). Behind the cake stamp, the paper has been sanded as well. Inks used were Desert Sand and Pink Carnation. Two tiny pieces of ribbon finish it off.

Simple tip... if you can't tie a good bow, a knot looks just as good! It saves a lot of ribbon too!


A little something
Saturday, October 07, 2006
I don't have a lot of layout samples completed yet... I will be posting lots as soon as they are completed. For now, though, I thought I'd post a card with a technique on it.

I view cards as mini scrapbook pieces. You put similar effort into the layout and design, but then you get to give it to someone... which makes it that much more special. I still consider myself to be a scrapbooker first and foremost, but cards just come with the territory. And, I'm getting more cards done than layouts these days, so a card it is.

This card took only minutes to design and complete. It uses only basic cardstock, and a stamp set (Totally Chic MyAcrylix set).


The background cardstock (Pink Carnation) has been dry embossed and sanded. The dry embossing makes the lines that you see (that are also raised). You can do this easily with an embossing stylus and your standard paper trimmer. Use the groove in the paper trimmer as your embossing guide. You can do all sorts of patterns (as long as they are lines). Once you've completed the pattern, simply turn it over and sand the embossed lines. This will expose the white core. I also sanded the edges of the card, and a little on the black cardstock. To make the inner flower of the purse pink, I simply stamped my primary image in black ink on the white cardstock, then stamped the image again on another piece of paper with pink carnation ink. I cut out the flower and glued it on.

A simple and easy to make your cardstock look special. Enjoy!


Starting off
Thursday, October 05, 2006
It is sooooo common for new scrapbookers to get completely and totally overwhelmed. So, a common question is: "What are the best products to start out with?". Good question...

  1. Get a paper trimmer. One that can be used for 12" paper. Most craft stores carry them. I've found great prices on them at Walmart. You shouldn't have to spend more than $20 on it.
  2. Some sort of adhesive. The fancy ones are nice, but glue stick works just fine. Don't be fooled by the "acid free" glue sticks that are pricey. ALL glue sticks by nature are acid free. By cheap ones at Dollar Stores, or at Costco. Also, two sided tape is really helpful - especially for pictures (I wouldn't use glue stick on a photo... though perhaps there are people that would?). Tombow is a great one (available through CTMH).
  3. Paper. Choose a color palette that you like, and get some coordinating pieces. I love that CTMH products come in groups of colors, so you already know what looks great together. Also CTMH cardstock has white core - this is essential to getting good use out of your cardstock. You can do fabulous layouts by distressing cardstock if it's white core. I'll show examples of this in future entries. Some coordinating B&T papers (background and texture) are great too. You will always use paper! If you aren't sure where to start, a paper packet (containing both cardstock and B&T papers) is a fabulous starter set. The My Reflections paper packets give you everything you would need for a great layout - cardstock, coordinating colors, coordinating B&T papers. They also have coordinating embellishment packets too!
  4. Some sort of embellishments. The best way to get the most for your money is to get embellishments that either go a long way (a pack of white eyelets or brads... brads are best if you don't have an eyelet setter, or white ribbon is a great embellishment) OR that can be reused. Stamps make amazing embellishments if you stamp and cut out the images, or build up the image by stamping on various colors of paper and piecing them together. I'll show examples of these soon too. They are a great way to embellish and save money! My advice would always be to start with brads, ribbon and a favorite stamp set & ink that is versatile. As mentioned before, you can also get coordinating embellishment packets to go with the My Reflections paper packets.
Down the road, I would also suggest a set of letter stamps. Because CTMH MyAcrylix stamps are set on separate blocks, you can write any word you want on a block and have a unique stamp every time. This is GREAT for titles and giving themes to your layouts. The acrylix alphabet sets are considerably cheaper than the rubber stamp sets!

A couple other cheap things that are great to have on hand are a good pair of scissors (small with a good point), some sandpaper, a piercing tool and an acid-free/pH-neutral pen.

Of course, you also need a scrapbook album and lots of pictures! Key features of a good album are that it opens flat, is built with page protectors so that you can easily change the order of layouts, has room for more pages and possible extender posts.

You can accomplish a LOT with these basic starter sets. Over the next several posts, I'll show you what I mean!


And it begins
Welcome! I've started this blog for several reasons.
  • Primarily, it is here to give scrapbookers lots of new ideas, techniques and creative motivation.
  • It's also hear to answer any questions you have about scrapping or paper crafting (feel free to email me on the link at the top). I will often post about questions I'm asked.
  • And, of course, because I'm an independent consultant for Close to my Heart products, I intend to show them off as best I can (which isn't hard to do, they are great products). If you ever want to order these products, you can contact me by email. I'll keep the site updated with current promotions and give aways!
  • I'll also keep you updated with upcoming classes, as well as post the work afterwards.
I hope to have some updates every few days. Please enjoy, ask lots of questions, and have fun scrapbooking!!!


footer